VALVE ADJUSTMENT - 8V SOLID LIFTER ENGINE |
||
| Tools: | ||
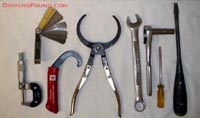
| A valve adjustment can be done
with a limited number of tools. Some are specialty tools, and some you should have already
(left to right): 1. Micrometer - used for measuring adjusting discs (if they are not marked). 2. Feeler gauges - used for measuring clearances. ($7.00) |
 |
|
| 3. Valve
adjusting tool - used to hold down the cam followers to allow removal of adjusting disc. ($45.00). 4. Valve shim pliers - used to remove the valve adjusting disc. ($40.00) 5. 19mm socket/wrench - used to turn the crankshaft and camshaft. 6. 10mm socket - used to remove valve cover nuts. 7. Flat head screwdrivers - used to remove hose clamps |
||
| Preparation: | ||
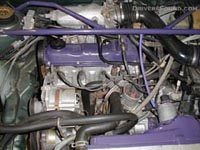
| 1. Run
the engine until it is warm to the touch (~95 Degrees F). 2. If you have an upper strut tie-bar, you will need to remove it. If you don't have one, get one, it's well worth the money! 3. Remove the two hoses attached to valve cover by losening the hose clamps. 4. Remove the eight 10mm nuts that attach the valve cover to the head. One will (or should) have a ground strap from the coil attached to it. Tuck this out of the way so it is easy to get to during reinstallation. 5. Remove the valve cover. Now is a good time to repaint it if it is old and rusty looking. 6. If you have an upper oil baffle, remove it. Once again, if you don't have one, you can pick one up from your VW dealer for about $20.00. |
 |
|
 |
||
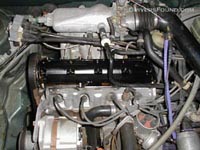
| With everything removed, it's time to adjust the valves. |  |
|
| Installation: | ||
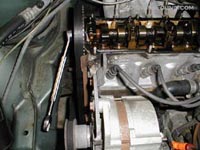
| 1. Starting
with cylinder 1 (closest to the timing belt), use a 19mm socket on the crankshaft sprocket
bolt to rotate the engine clockwise until both camshaft lobes are pointing up. The preferred method of turning the engine is using the crankshaft sprocket bolt. The camshaft sprocket bolt can to used to turn the motor slightly. |
 |
|
| Both valves (intake/exhaust) will be closed, and you will notice that if you move the camshaft slightly, neither will move. | 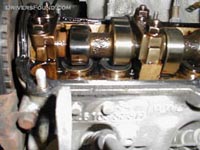 |
|
| 2. Using a feeler gauge, measure the valve clearance on both valves. Write these numbers down. | 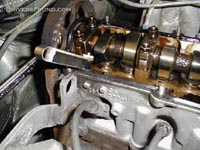 |
|
| 3. Compress the cam followers using the Valve Adjusting Tool. |  |
|
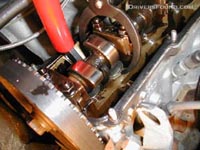
| 4. Remove the
adjusting discs using the Valve Shim Pliers. Place the tips of the pliers in the two
notches in the cam follower. While this tool may not be 100% necessary, it makes the
job much easier. You could probably use a screwdriver to pry out the disc. Write down the number on the bottom side of the disc. If the number is not written on the disc, measure it using a micrometer. |
 |
|
| 5. Reinstall the discs, putting a little oil on the contact surface. This step assumes you do not have extra adjusting discs on hand and will have to go purchase them. | Valve Order (left to right) E-I E-I I-E I-E E= Exhaust I=Intake |
|
| 6. If the valve
clearance is too small, you will need a thinner disc. If the valve clearance is too
large, you will need a thicker disc. Using the dimensions found in steps 2 and 4,
calculate the disc sized needed to achieve the desired valve clearance. 7. Repeat steps 1 to 6 for each cylinder. |
Valve Clearance Specifications (per Bentley Service Manual) Engine Warm Engine Cold |
|
| 8. Once you have determined what size adjusting discs you need, go to your local autoparts store or dealer and purchase the proper sizes. (about $2.00 each) | Sample Calculation Desired Clearance:
0.25mm (.010 in.) Current Adjusting disc size:
3.70 mm |
|
| 9. With the proper discs on hand, remove the old discs and install the new ones as done above. Be sure to oil the contact surfaces. The side with the size markings faces down. Rotate the camshaft two complete rotations to insure that the discs are properly seated. | 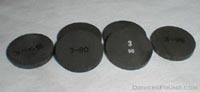 |
|
| Completion:: | ||
| 1. If
you have an upper oil baffle, reinstall it. 2. Install a new valve cover gasket. If you were using a cork-type gasket, now is a great time to upgrade to the rubber valve cover gasket - reusable and better sealing - for only about $20.00. 3. Reinstall the valve cover. 4. Attach the ground strap, and install the eight 10mm nuts. 5. Reattach the two hoses and tighten down the hose clamps. 6. Valve adjustment complete! |
||